새소식
반응형
폼 로그인 방식 중 구글 로그인을 위한 예제입니다.
지난 소셜 로그인 글과 이어집니다.
※ 테스트 환경
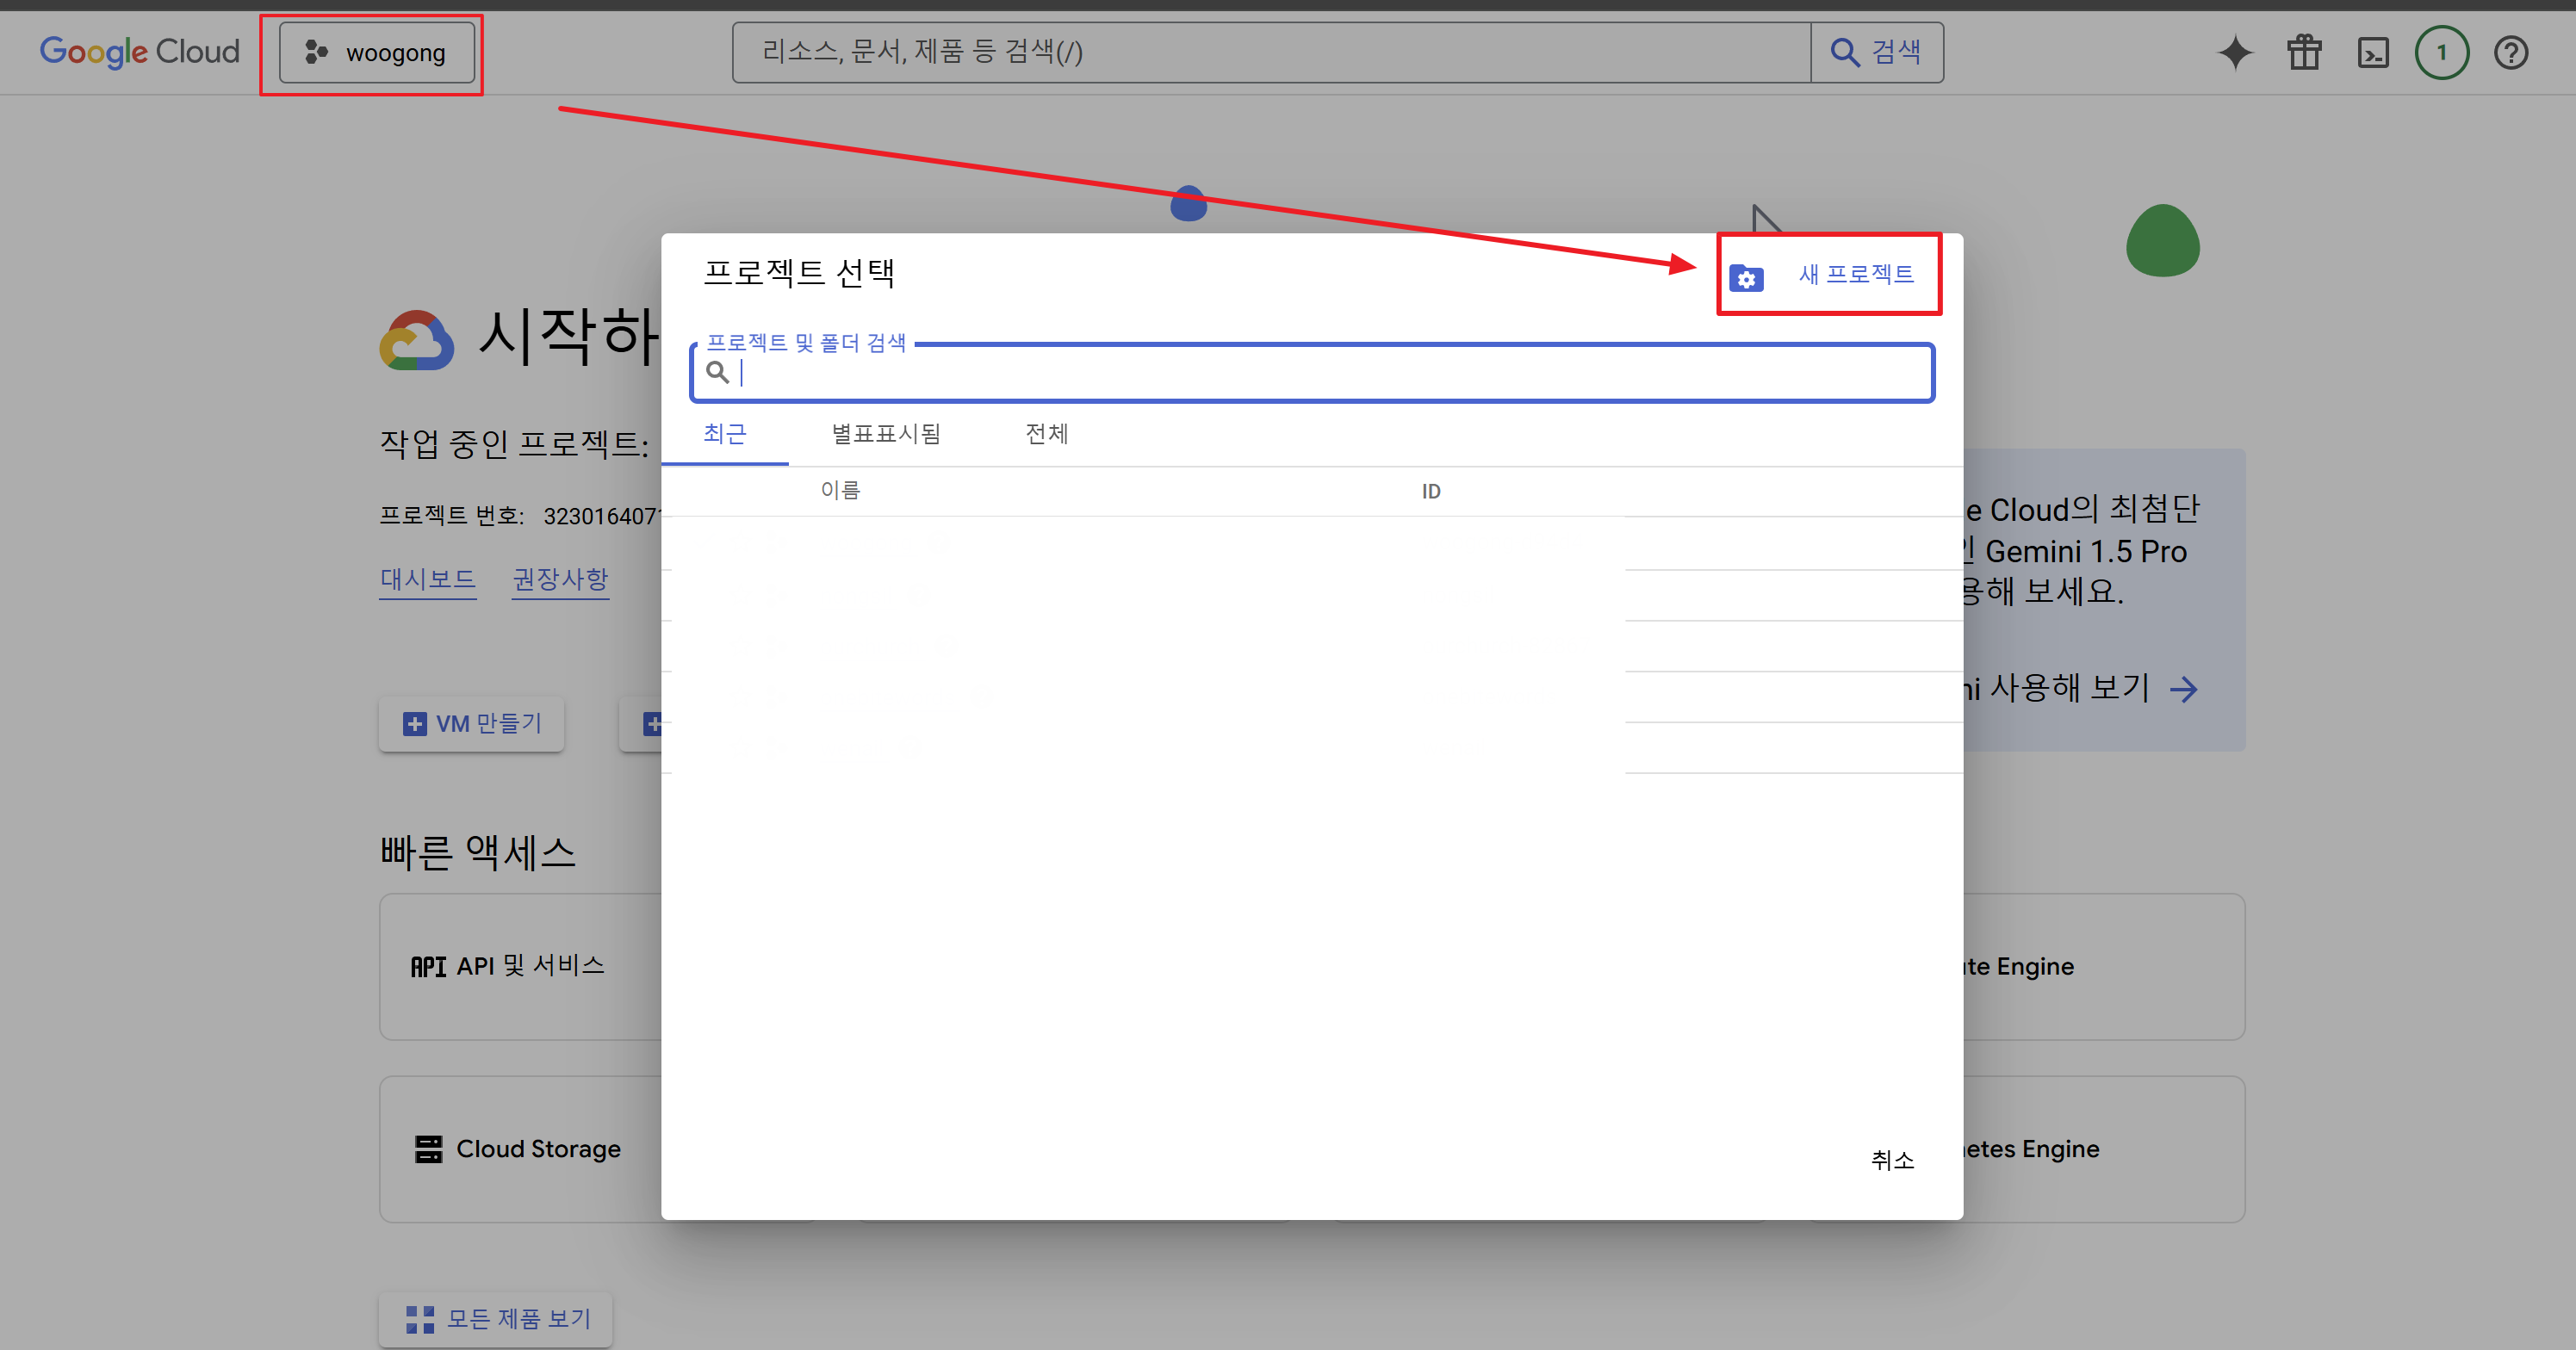
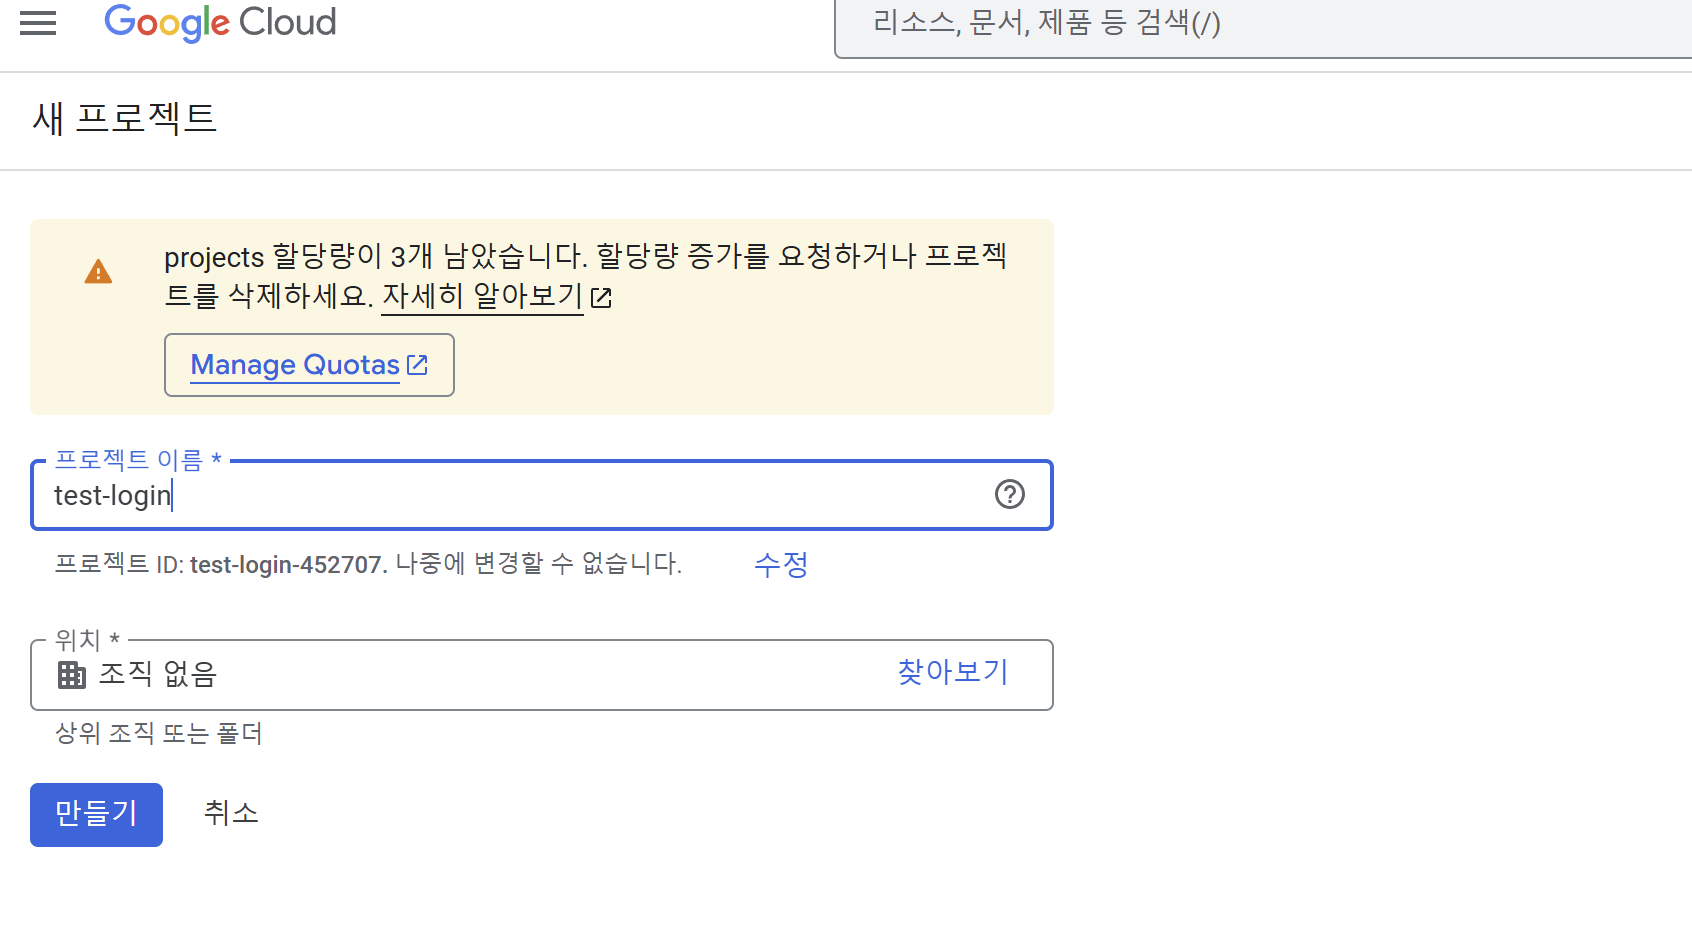
새 프로젝트를 생성합니다.
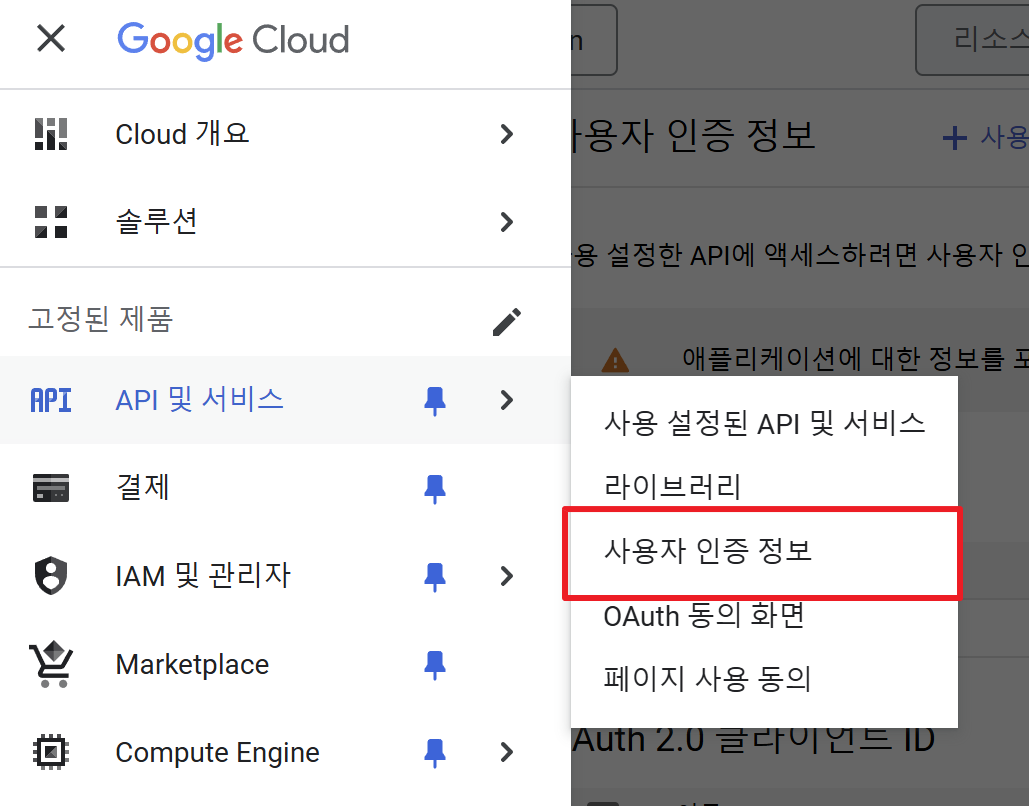
1) 메뉴의 API 및 서비스에서 사용자 인증 정보를 클릭
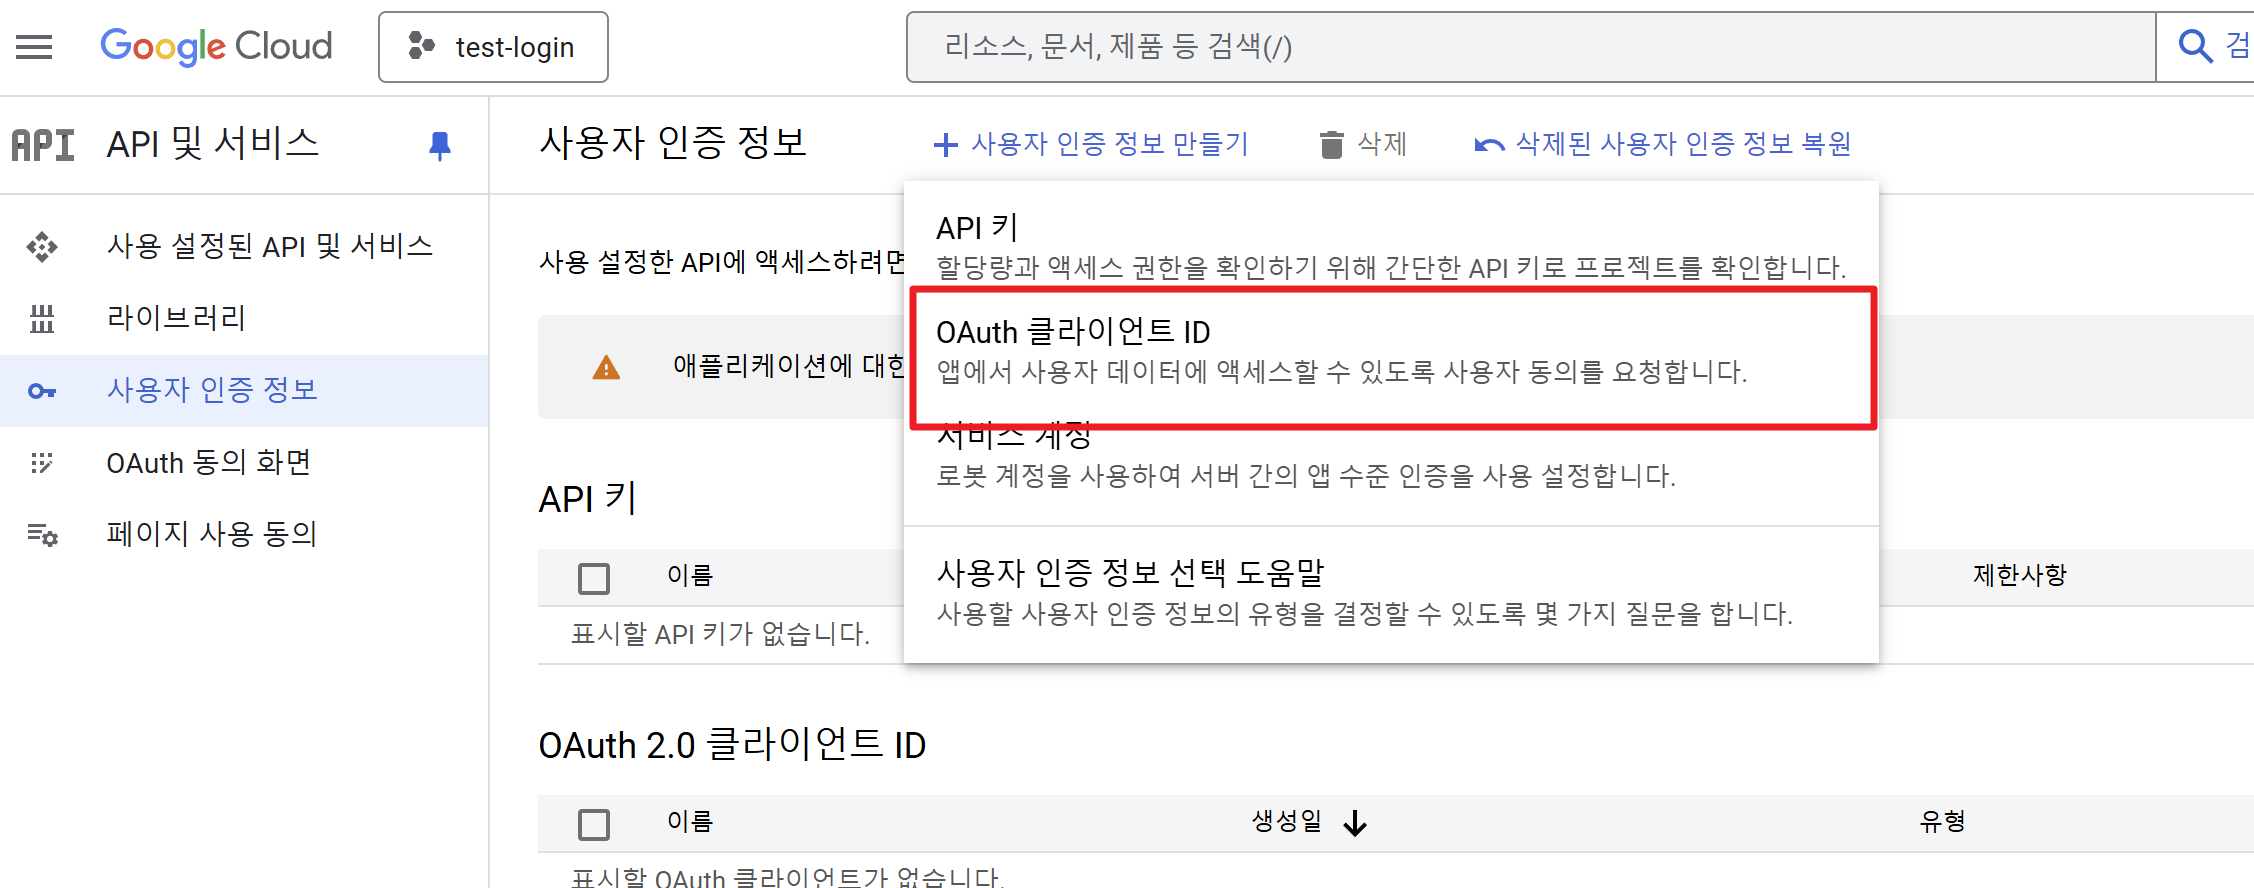
2) 사용자 인증 정보 만들기 - OAuth 클라이언트 ID를 클릭
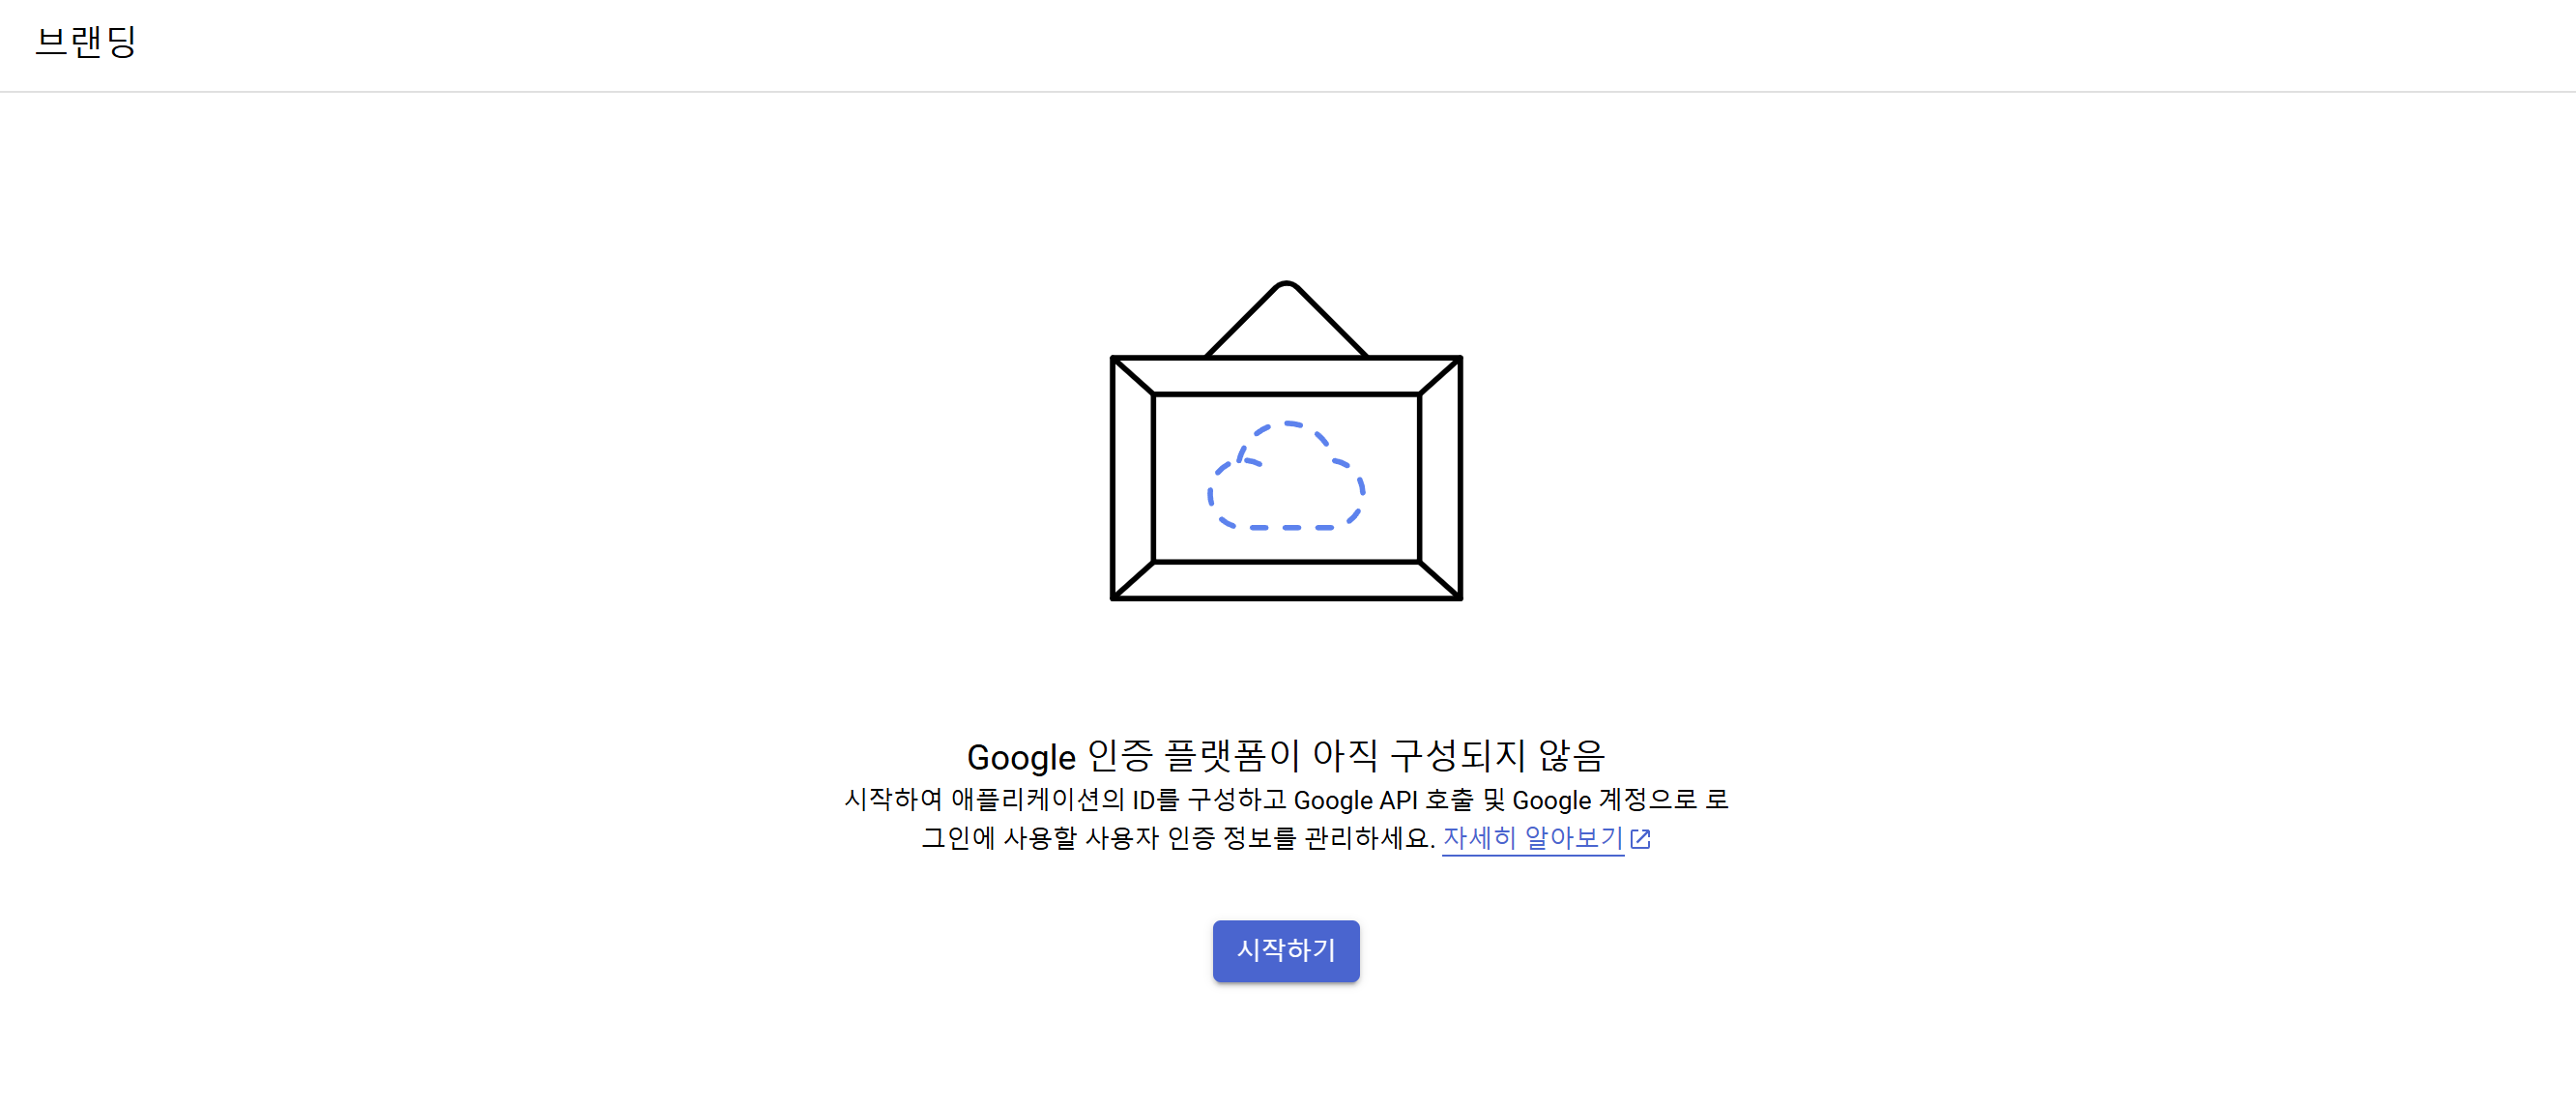
3) 동의 화면 구성 클릭

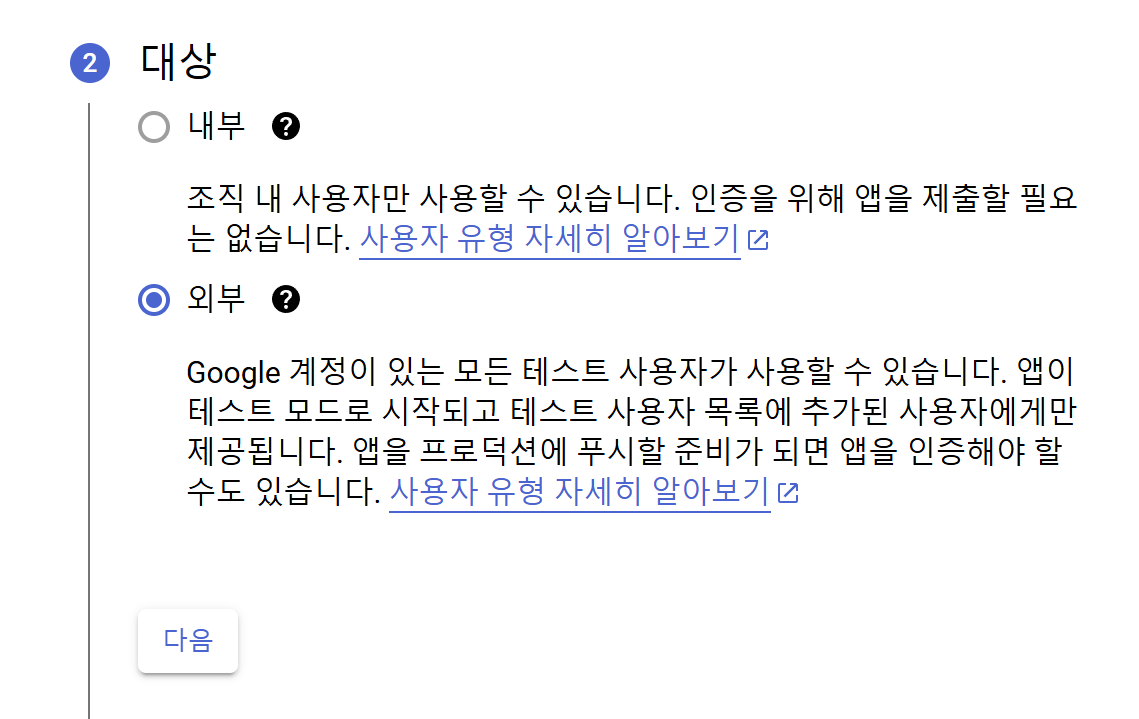
4) 시작하기
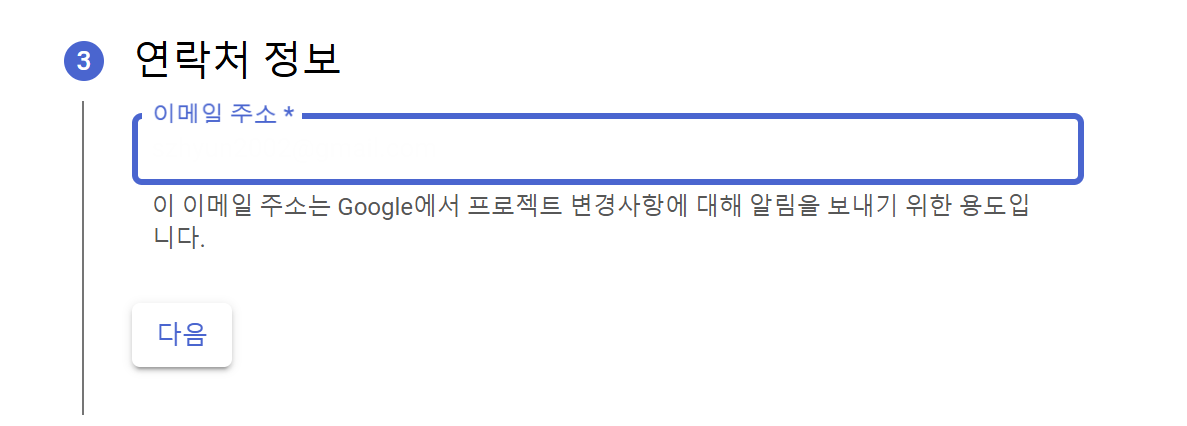
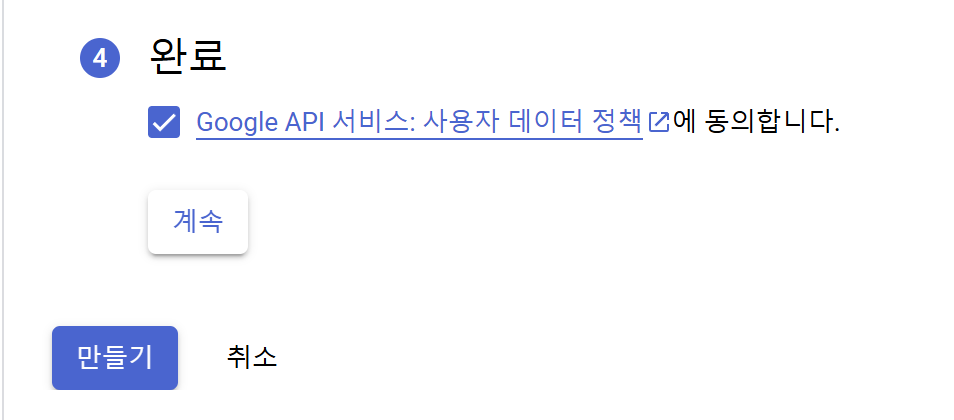
5) 앱 정보 입력 후 만들기

1) OAuth 클라이언트 만들기 클릭
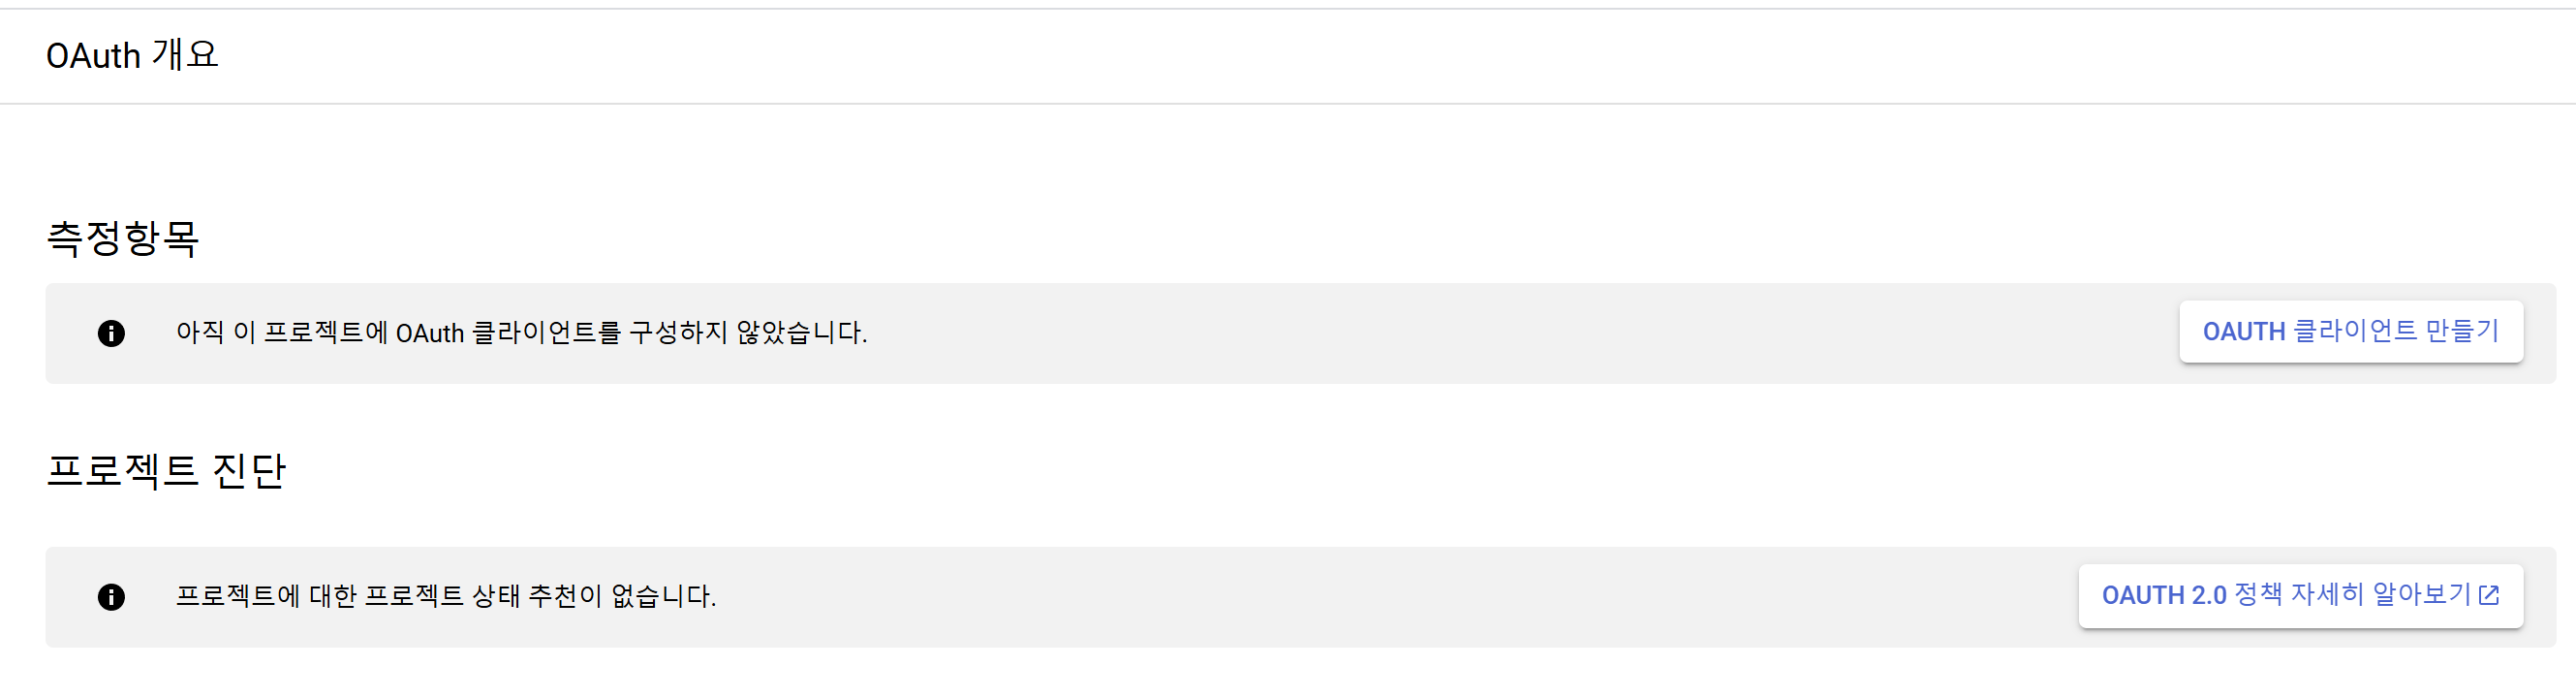
2) 애플리케이션 유형 선택 후 리디렉션 URI 입력

카카오 로그인과 동일하게 클라이언트 ID, 보안키를 통해 서버로 인증 코드를 요청하고, 응답받은 인증 코드를 통해 액세스 토큰을 가져옵니다.

# 구글 로그인 설정
google.client.id=클라이언트 ID
google.client.secret=클라이언트 보안 비밀번호
google.redirect.url=http://localhost:9090/google/callback
1) DTO 생성
구글 로그인 이후 id, email, name과 같은 키값으로 사용자 정보를 가져오게 됩니다.
@Data
@Builder
public class GoogleAccount {

    private Long id;
    private String email;
    private String name;

}
2) Controller 생성
1-4에서 등록한 리다이렉트 주소로 연결한 컨트롤러를 생성합니다.
@RestController
@RequiredArgsConstructor
@RequestMapping("google")
public class GoogleController {

    private final GoogleService googleService;

    @GetMapping("/callback")
    public ResponseEntity<MsgEntity> callback(HttpServletRequest request) throws Exception {
        GoogleAccount account = googleService.getGoogleAccountInfo(String.valueOf(request.getParameter("code")));

        return ResponseEntity.ok()
                .body(new MsgEntity("Success", account));
    }
}
3) Service 생성
@Slf4j
@Service
@RequiredArgsConstructor
public class GoogleService {

    @Value("${google.client.id}")
    private String GOOGLE_CLIENT_ID;

    @Value("${google.client.secret}")
    private String GOOGLE_CLIENT_SECRET;

    @Value("${google.redirect.url}")
    private String GOOGLE_REDIRECT_URL;

    private final static String GOOGLE_AUTH_URI = "https://accounts.google.com/o/oauth2/v2/auth";
    private final static String GOOGLE_TOKEN_URI = "https://oauth2.googleapis.com/token";
    private final static String GOOGLE_RESOURCE_URI = "https://www.googleapis.com/oauth2/v2/userinfo";
    private final ObjectMapper objectMapper;

    public String getGoogleLogin() {
        return GOOGLE_AUTH_URI + "?client_id=" + GOOGLE_CLIENT_ID
                + "&redirect_uri=" + GOOGLE_REDIRECT_URL
                + "&response_type=code&scope=email profile";
    }

    public GoogleAccount getGoogleAccountInfo(String code) throws Exception {
        if (code == null) throw new Exception("Failed get authorization code");

        String accessToken = "";

        try {
            HttpHeaders headers = new HttpHeaders();
            headers.add("Content-type", "application/x-www-form-urlencoded");

            MultiValueMap<String, String> params = new LinkedMultiValueMap<>();
            params.add("grant_type"   , "authorization_code");
            params.add("client_id"    , GOOGLE_CLIENT_ID);
            params.add("client_secret", GOOGLE_CLIENT_SECRET);
            params.add("code"         , code);
            params.add("redirect_uri" , GOOGLE_REDIRECT_URL);

            RestTemplate restTemplate = new RestTemplate();
            HttpEntity<MultiValueMap<String, String>> httpEntity = new HttpEntity<>(params, headers);

            ResponseEntity<String> response = restTemplate.exchange(GOOGLE_TOKEN_URI, HttpMethod.POST, httpEntity, String.class);

            if (response.getStatusCode() == HttpStatus.OK && response.getBody() != null) {
                JsonNode jsonNode = objectMapper.readTree(response.getBody());
                accessToken = jsonNode.path("access_token").asText();
            }
        } catch (Exception e) {
            throw new Exception("API call failed");
        }

        return getUserInfoWithToken(accessToken);
    }

    private GoogleAccount getUserInfoWithToken(String accessToken) throws Exception {
        //HttpHeader 생성
        HttpHeaders headers = new HttpHeaders();
        headers.add("Authorization", "Bearer " + accessToken);
        HttpEntity<MultiValueMap<String, String>> httpEntity = new HttpEntity<>(headers);

        //HttpHeader 담기
        RestTemplate restTemplate = new RestTemplate();
        JsonNode userResourceNode = restTemplate.exchange(GOOGLE_RESOURCE_URI, HttpMethod.GET, httpEntity, JsonNode.class).getBody();

        log.info(userResourceNode.toString());

        if (userResourceNode == null) throw new Exception("API call failed");

        return GoogleAccount.builder()
                .id(userResourceNode.get("id").asLong())
                .name(userResourceNode.get("name").asText())
                .email(userResourceNode.get("email").asText())
                .build();
    }

}
추가된 메소드는 다음과 같습니다.
getGoogleLogin()
getGoogleAccountInfo(String code)
getUserInfoWithToken(String accessToken)
getGoogleLogin() 메소드를 통해 인증 코드를 전달받습니다.
이후 getGoogleAccountInfo(String code)로 인증 코드를 넘겨 액세스 토큰을 요청하고, 해당 액세스 토큰을 통해 getUserInfoWithToken(String accessToken) 메소드로 사용자 정보를 가져오게 됩니다.
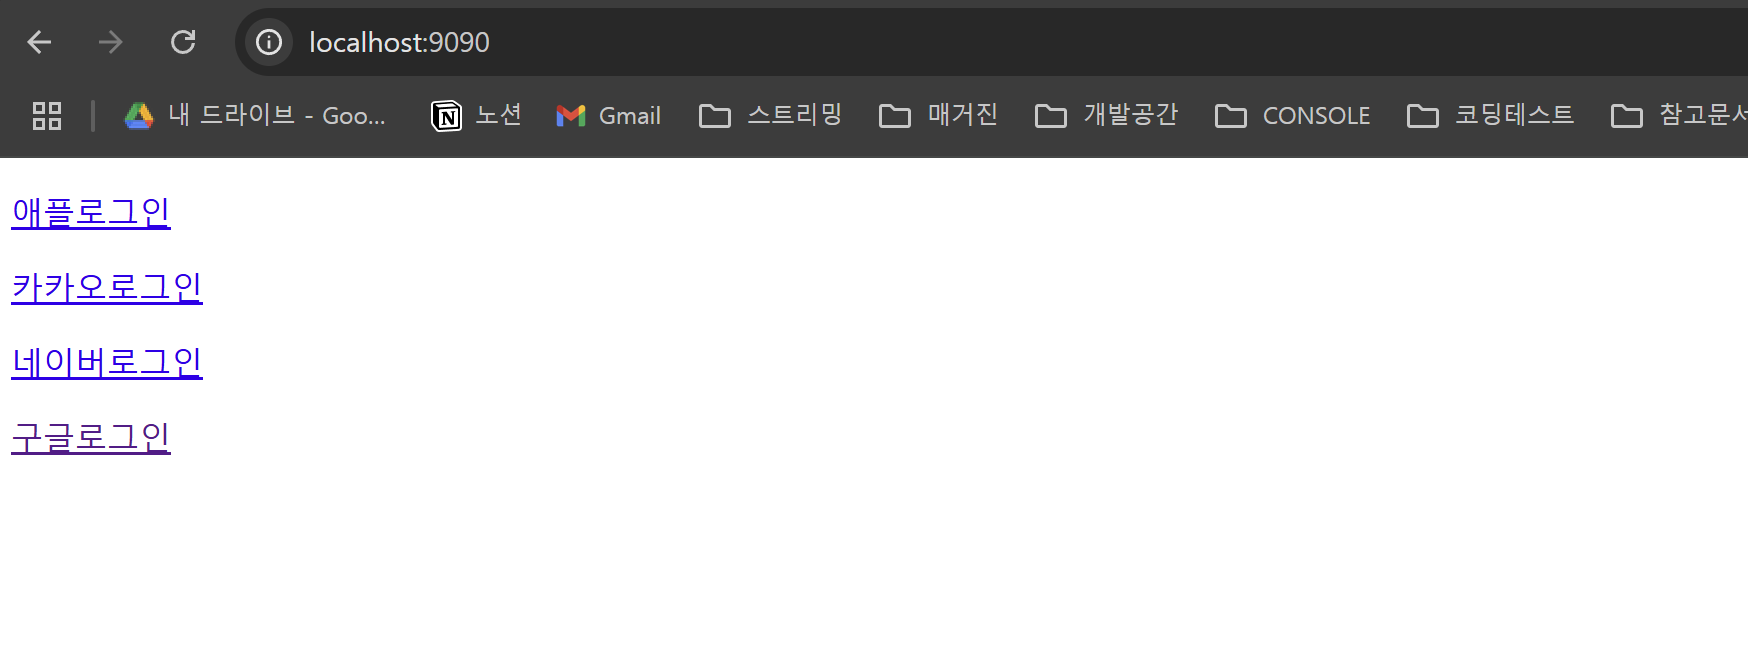
로그인 폼을 생성하여 테스트해봅니다.
4) 로그인 폼 생성
@Controller
@RequiredArgsConstructor
public class HomeController {

    private final AppleService appleService;
    private final KakaoService kakaoService;
    private final NaverService naverService;
    private final GoogleService googleService;

    @RequestMapping(value="/", method= RequestMethod.GET)
    public String login(Model model) {
        model.addAttribute("appleUrl", appleService.getAppleLogin());
        model.addAttribute("kakaoUrl", kakaoService.getKakaoLogin());
        model.addAttribute("naverUrl", naverService.getNaverLogin());
        model.addAttribute("googleUrl", googleService.getGoogleLogin());

        return "index";
    }

}
<!DOCTYPE html>
<html lang="ko" xmlns:th="http://www.thymeleaf.org">
<head>
<title>소셜로그인 예제</title>
</head>
<body>
<div>
<p><a th:href="@{|${appleUrl}|}">애플로그인</a></p>
<p><a th:href="@{|${kakaoUrl}|}">카카오로그인</a></p>
<p><a th:href="@{|${naverUrl}|}">네이버로그인</a></p>
<p><a th:href="@{|${googleUrl}|}">구글로그인</a></p>
</div>
</body>
</html>
5) 결과
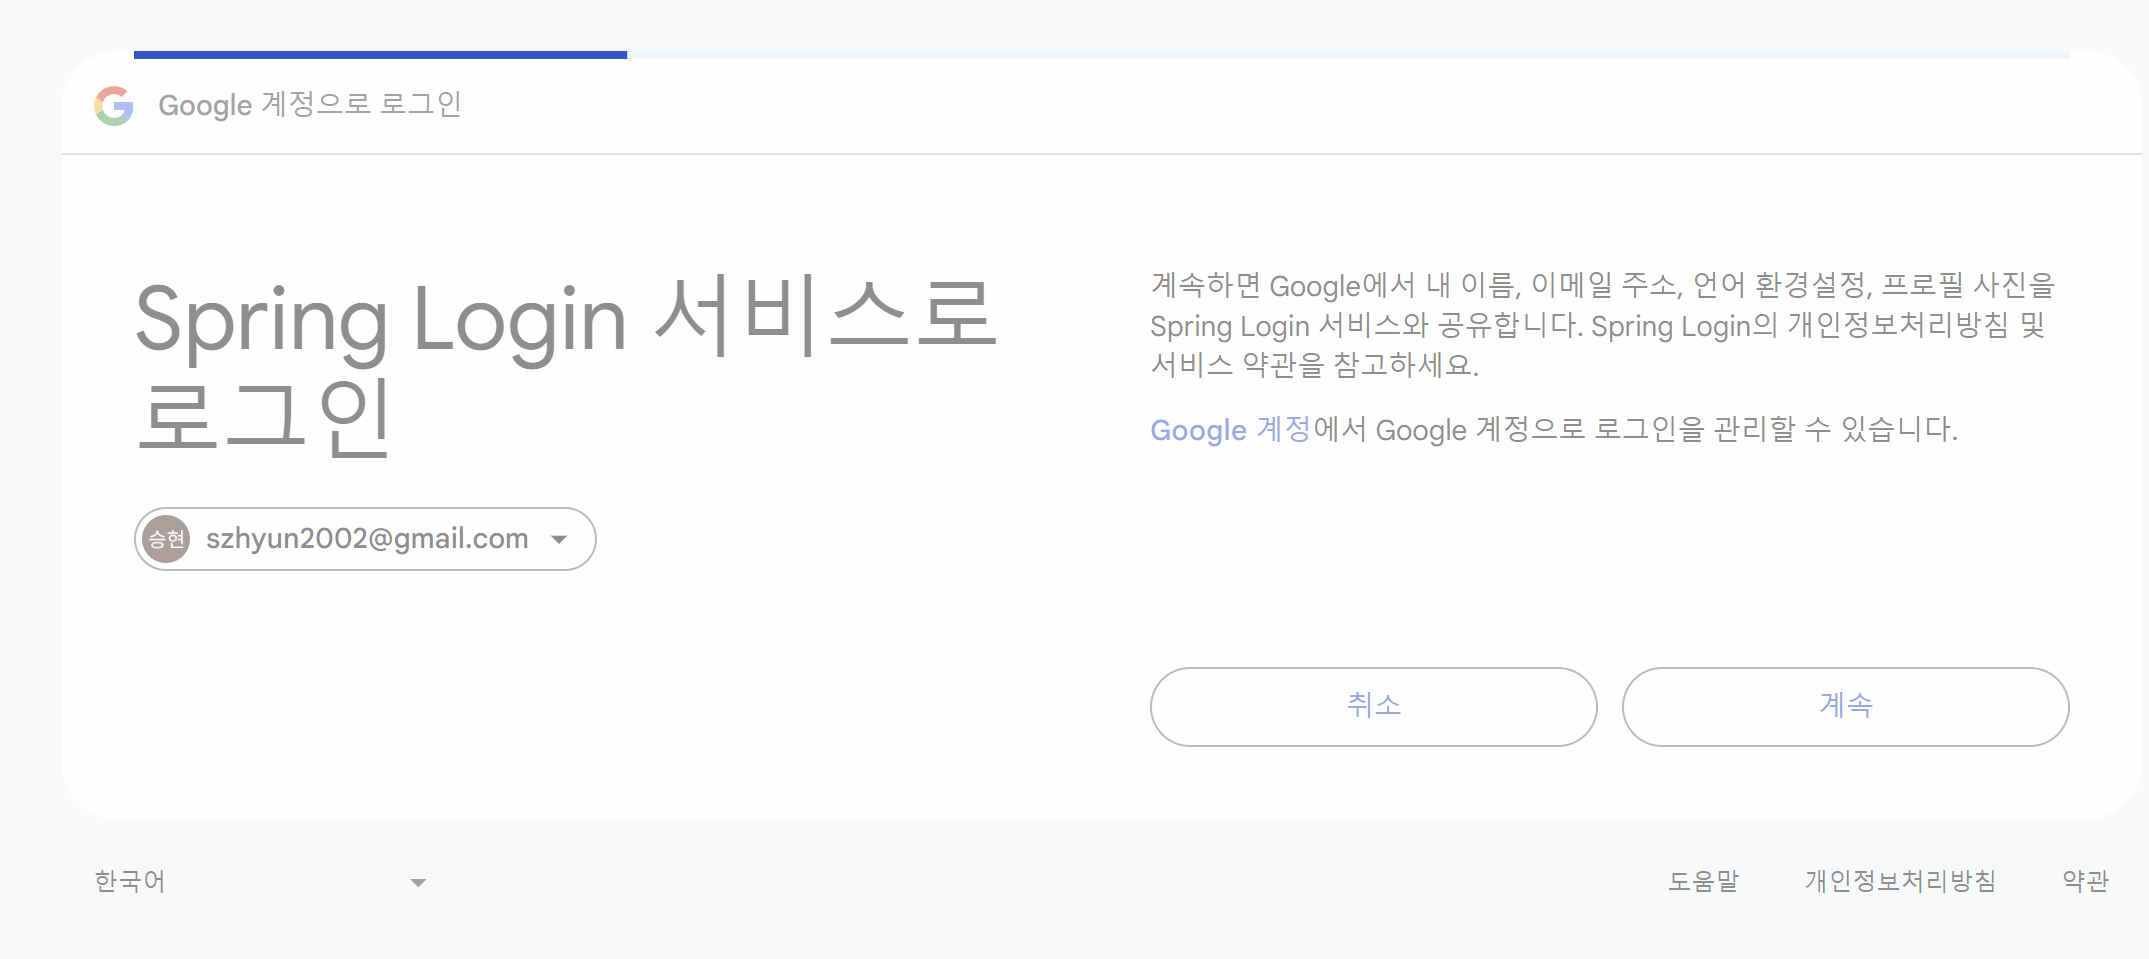
이후에는 반환된 정보를 통해 회원 등록 또는 로그인 처리를 진행할 수 있습니다.
api로부터 반환되는 정보들은 아래와 같습니다.
{"id":"고유아이디",
"email":"구글 이메일",
"verified_email":true,
"name":"성+이름",
"given_name":"이름",
"family_name":"성",
"picture":"https://lh3.googleusercontent.com........"}
+ 피드백은 언제나 환영입니다 :)
전체 소스는 GitHub에서 확인하실 수 있습니다.
| [Spring Boot]Springdoc 적용하기 (1) | 2024.12.23 |
|---|---|
| [Spring Boot]압축 전송하기 (0) | 2024.12.06 |
| [Spring Boot]HttpClient와 WebClient 사용해보기 (0) | 2024.11.27 |
| [Spring Boot]대량 데이터 저장하기 (0) | 2024.10.17 |
| [Spring Boot]Oracle DB 연결하기 (1) | 2024.09.02 |
소중한 공감 감사합니다.