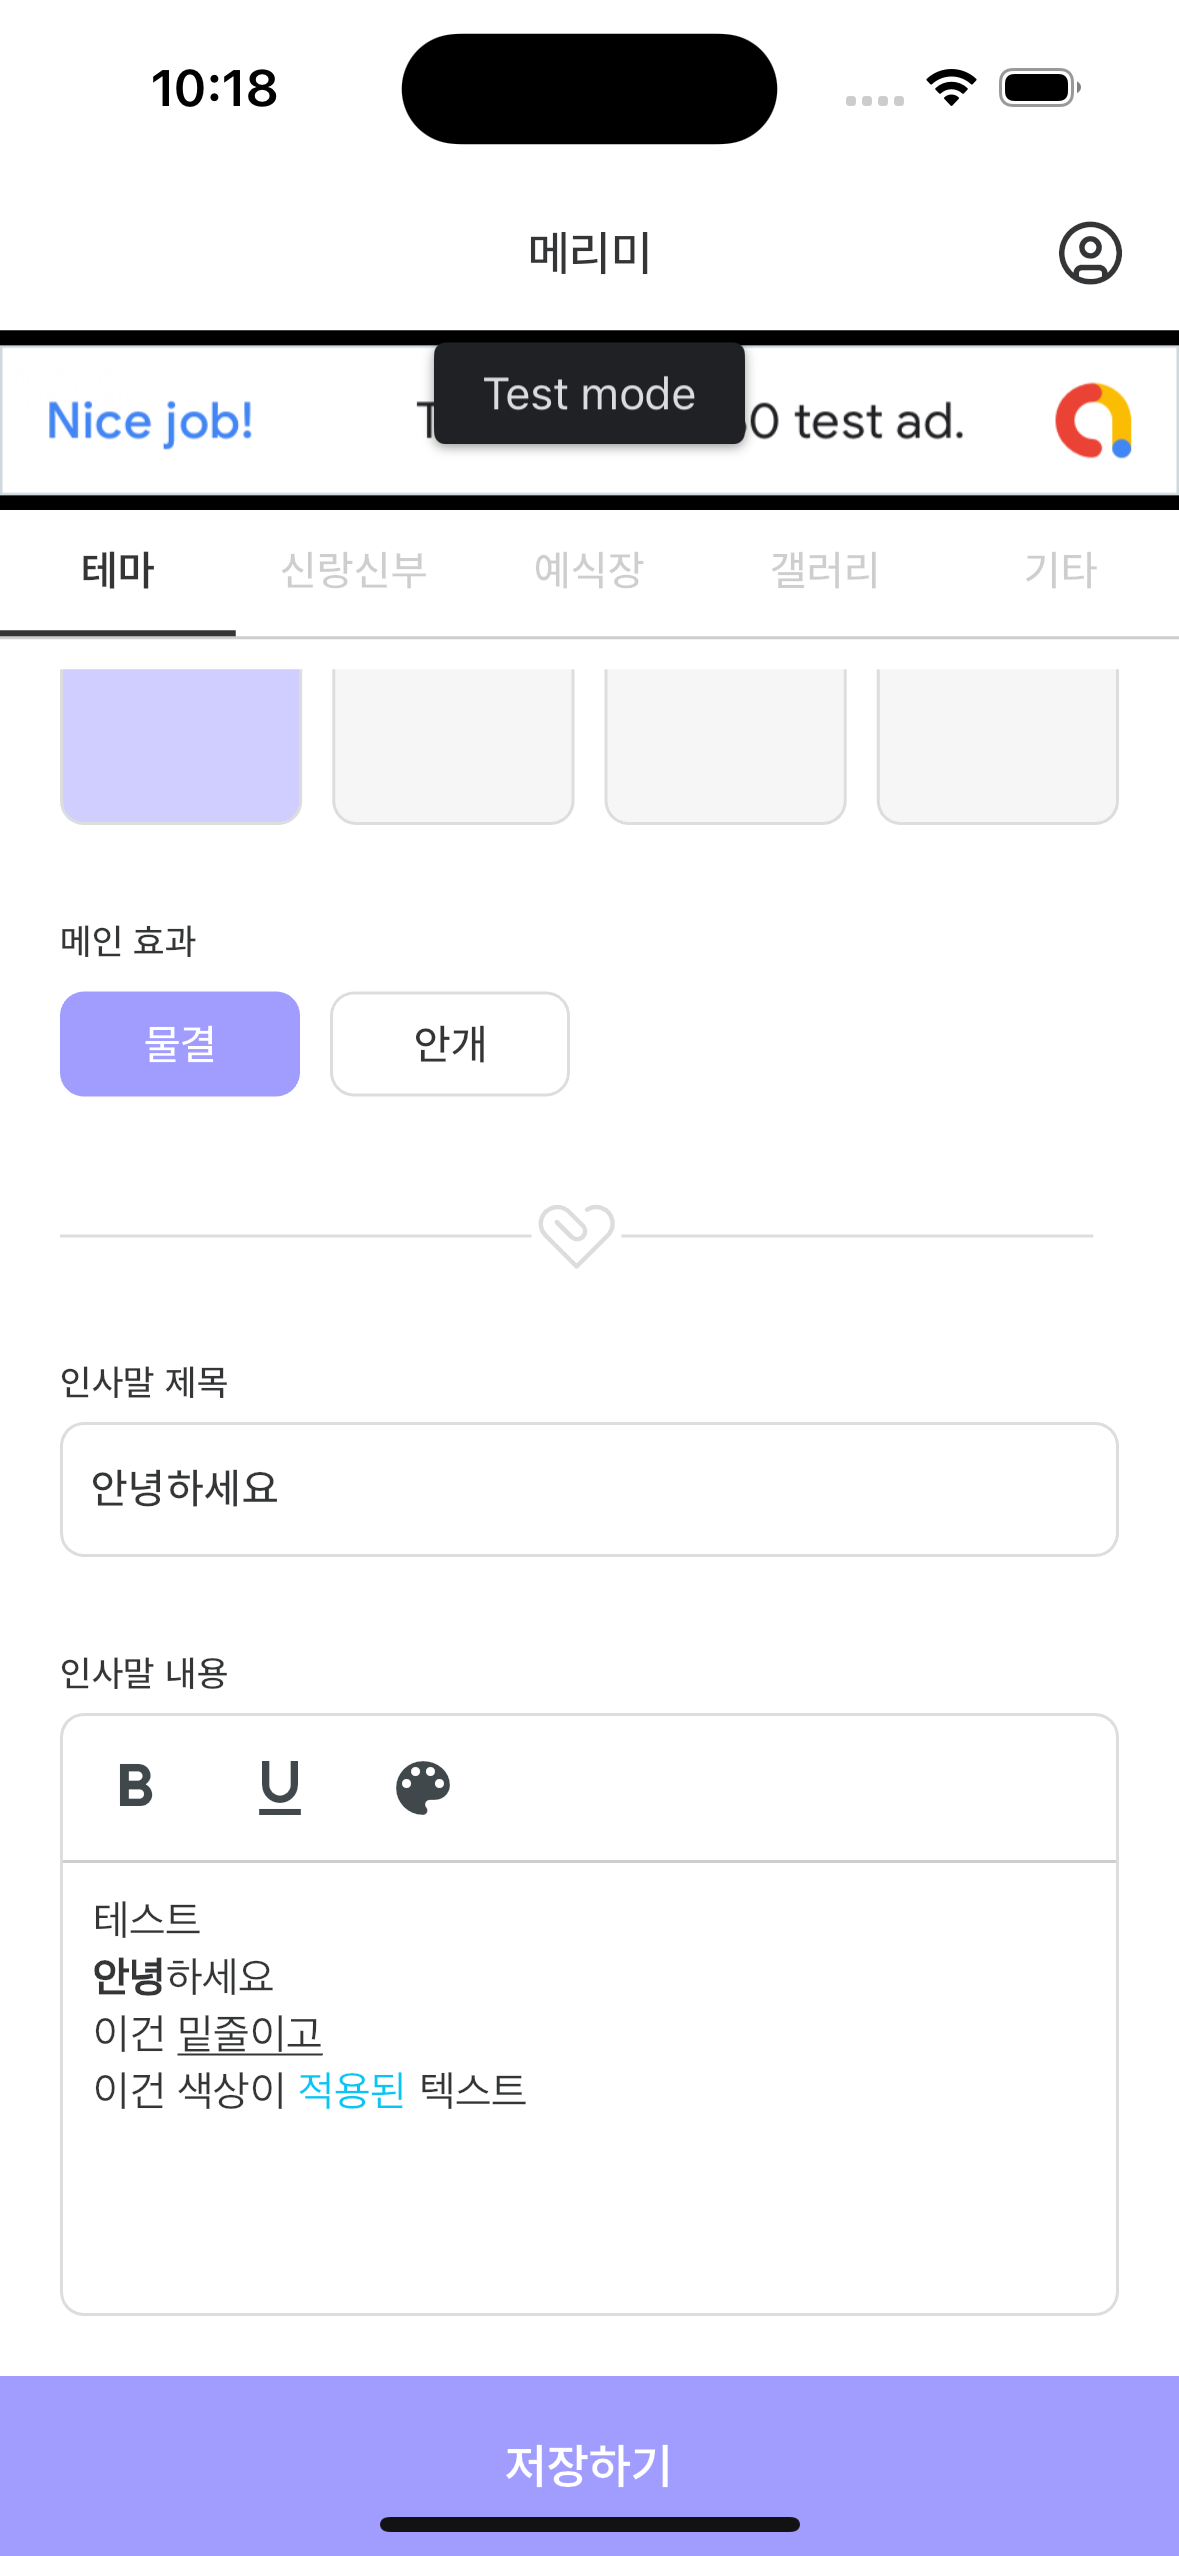
[Flutter]Text Editor 적용하기
- -
최근 모바일앱을 개발하며 Text Editor 기능을 추가하게 되었습니다. 앱에서의 에디터 기능 추가는 처음이었는데, 역시나 라이브러리가 잘 되어 있어 어렵지 않게 만들 수 있었습니다.
오늘은 Text Editor로 사용한 flutter_quill 사용법에 대해 알아보겠습니다.
※ 테스트 환경
- Flutter 3.22.3
- Dart 3.4.4
1. 패키지 설치
현재 개발 중인 서비스에서는 모바일앱에서 에디터를 통해 글을 작성하게 되면 API를 통해 DB에 저장된 후, 웹 브라우저를 통해 보여지게 됩니다.
이러한 구조를 위해 아래 3개의 패키지를 설치합니다.
flutter_quill: ^9.1.1
vsc_quill_delta_to_html: ^1.0.5
flutter_quill_delta_from_html: ^1.3.12- flutter_quill : 에디터 기능 사용을 위해 필요합니다.
- vsc_quill_delta_to_html, flutter_quill_delta_from_html
- flutter_quill 에디터 기능을 사용하게 되면 Delta라는 속성으로 문서의 상태를 표현하게 됩니다. 따라서 해당 속성을 읽고 변환하기 위해 해당 패키지들이 사용됩니다.
[
  { "insert": "Hello, " },
  { "insert": "world", "attributes": { "bold": true } },
  { "insert": "!\n" }
]
2. flutter_quill 적용하기
MyTextEditor 위젯을 생성합니다. 이 위젯은 ScrollController와 QuillController를 인자값으로 전달받습니다.
*widget***Color, grayBoxColor로 정의된 값들은 상수로 정의된 색상 값입니다.
class MyTextEditor extends ConsumerWidget {
  final ScrollController scrollController;
  final QuillController contentController;

  const MyTextEditor({
    Key? key,
    required this.scrollController,
    required this.contentController,
  }) : super(key: key);

  @override
  Widget build(BuildContext context, WidgetRef ref) {
    final screen = MediaQuery.of(context).size;

    return Column(
      crossAxisAlignment: CrossAxisAlignment.start,
      children: [
        QuillSimpleToolbar(
          configurations: QuillSimpleToolbarConfigurations(
            toolbarSectionSpacing: 0,
            toolbarIconAlignment: WrapAlignment.start,
            toolbarIconCrossAlignment: WrapCrossAlignment.start,
            controller: contentController,
            showFontFamily: false,
            showFontSize: false,
            showItalicButton: false,
            showSmallButton: false,
            showStrikeThrough: false,
            showInlineCode: false,
            showBackgroundColorButton: false,
            showClearFormat: false,
            showAlignmentButtons: false,
            showLeftAlignment: false,
            showCenterAlignment: false,
            showRightAlignment: false,
            showJustifyAlignment: false,
            showHeaderStyle: false,
            showListNumbers: false,
            showListBullets: false,
            showListCheck: false,
            showCodeBlock: false,
            showQuote: false,
            showIndent: false,
            showLink: false,
            showUndo: false,
            showRedo: false,
            showDirection: false,
            showSearchButton: false,
            showSubscript: false,
            showSuperscript: false,
            showClipboardCut: false,
            showClipboardCopy: false,
            showClipboardPaste: false,
            buttonOptions: QuillSimpleToolbarButtonOptions(
              bold: QuillToolbarToggleStyleButtonOptions(
                iconTheme: QuillIconTheme(
                  iconButtonSelectedData: IconButtonData(
                      color: widgetWhiteColor,
                      hoverColor: widgetMainColor,
                      style: ButtonStyle(
                        backgroundColor:
                            WidgetStateProperty.all(widgetMainColor),
                      )),
                ),
              ),
              underLine: QuillToolbarToggleStyleButtonOptions(
                iconTheme: QuillIconTheme(
                  iconButtonSelectedData: IconButtonData(
                      color: widgetWhiteColor,
                      hoverColor: widgetMainColor,
                      style: ButtonStyle(
                        backgroundColor:
                            WidgetStateProperty.all(widgetMainColor),
                      )),
                ),
              ),
            ),
          ),
        ),
        Container(
          width: screen.width,
          height: 1,
          color: grayBoxColor,
        ),
        QuillEditor(
          focusNode: FocusNode(),
          scrollController: scrollController,
          configurations: QuillEditorConfigurations(
            controller: contentController,
            padding: const EdgeInsets.all(10),
            scrollable: true,
            expands: false,
            minHeight: 150,
            maxHeight: 150,
            customStyles: const DefaultStyles(
              paragraph: DefaultTextBlockStyle(
                TextStyle(
                  color: widgetBlackColor,
                  fontSize: fontMediumSize,
                ),
                VerticalSpacing(1, 0),
                VerticalSpacing(1, 0),
                BoxDecoration(),
              ),
            ),
            scrollPhysics: const ScrollPhysics(),
          ),
        ),
      ],
    );
  }
}- QuillSimpleToolbar
- 에디터 툴바의 옵션을 정의합니다.
- 툴바에는 다양한 옵션들이 존재하여 필요한 옵션(굵기, 밑줄, 글자색상)들만 사용하기 위해 다른 옵션은 모두 false로 설정했습니다.
- buttonOptions을 통해 각 옵션의 스타일을 재정의할 수 있습니다.
- QuillEditor
- 에디터가 적용되어 보여집니다.
- QuillEditor를 사용하기 위해서는 ScrollController와 QuillController가 필요합니다.

3. 저장하기
StringUtils 클래스를 생성하고, 에디터를 통해 작성된 내용을 저장하기 위해 작성된 내용을 String 형태로 변환하는 함수를 추가합니다.
class StringUtils {
  static String parsedDeltaToText(
      {required quill.QuillController quillController}) {
    String introContent = '';

    try {
      // hex colors in #AARRGGBB format are allowed in the ops
      ConverterOptions option = ConverterOptions();
      option.sanitizerOptions.allow8DigitHexColors = true;

      final deltaJson = quillController.document.toDelta().toJson();
      final QuillDeltaToHtmlConverter converter =
          QuillDeltaToHtmlConverter(List.castFrom(deltaJson), option);

      introContent = converter.convert();
    } catch (e) {
      introContent = quillController.plainTextEditingValue.text;
    }

    return introContent;
  }
}- option.sanitizerOptions.allow8DigitHexColors = true;
- 에디터 옵션 중 글자 색상에는 hex colors가 사용되는데 해당 포맷을 설정해주지 않으면 변환 과정에서 오류가 발생합니다. (hex colors in #AARRGGBB format are allowed in the ops)
- quillController.document.toDelta().toJson()
- 위 화면에 작성된 내용을 조회해보면 아래와 같이 List<Map<String, dynamic>> 형태로 저장됩니다.

- QuillDeltaToHtmlConverter(List.castFrom(deltaJson), option) : List로 저장된 값을 String 형태로 변환합니다.

4. 조회하기
html 태그가 포함된 내용을 조회(에디터에 표시)하기 위해서는 다시 한번 변환 과정이 필요합니다.
StringUilts 클래스에 아래 함수를 추가합니다.
static Delta parsedHtmlToDelta({required String html}) {
    Delta result = HtmlToDelta().convert(html);
    Delta modifiedResult = Delta();

    for (var operation in result.toList()) {
      var attributes = operation.attributes != null
          ? Map<String, dynamic>.from(operation.attributes!)
          : null;

      // 'color' 속성이 있다면 수정 : Hex ->
      if (attributes != null && attributes.containsKey('color')) {
        String colorValue = attributes['color'];
        attributes['color'] = colorValue.substring(0, 7);
      }

      modifiedResult.push(Operation(
        operation.key,
        operation.length,
        operation.value,
        attributes,
      ));
    }

    final deltaJson = modifiedResult.toJson();
    final QuillDeltaToHtmlConverter converter =
        QuillDeltaToHtmlConverter(List.castFrom(deltaJson));

    String modifyHtml = converter.convert();

    return HtmlToDelta().convert(modifyHtml);
}
에디터 위젯을 그릴 때 저장된 내용을 Delta로 변환하고, QuillController를 전달합니다.
if (themeModel.introContent != '') {
  final delta =
      StringUtils.parsedHtmlToDelta(html: themeModel.introContent!);

  _introContentController = QuillController(
    document: Document.fromDelta(delta),
    selection: const TextSelection.collapsed(offset: 0),
  );
}
5. 웹에서 조회하기
이제 이 문자열을 DB에 저장하고 웹 브라우저를 통해 조회해보겠습니다.
저장된 html 태그들을 통해 css를 활용하여 스타일을 적용할 수 있습니다.
strong {
  font-weight: bold;
}

u {
 text-decoration: underline;
}

참고문서
flutter_quill | Flutter package
A rich text editor built for Android, iOS, Web, and desktop platforms. It's the WYSIWYG editor and a Quill component for Flutter.
pub.dev
'Framework > Flutter' 카테고리의 다른 글
| [Flutter]홈 위젯 만들기 iOS편 - 1) 위젯 추가하기 (0) | 2025.06.11 |
|---|---|
| [Flutter]다국어 구현 (1) | 2025.02.21 |
| [Error]Linker command failed with exit code 1 (use -v to see invocation) (0) | 2025.01.02 |
| [Error]Flutter 설치 에러 모음 (0) | 2024.12.18 |
| [Flutter]Naver Map 사용하기 (1) | 2024.12.09 |
소중한 공감 감사합니다.